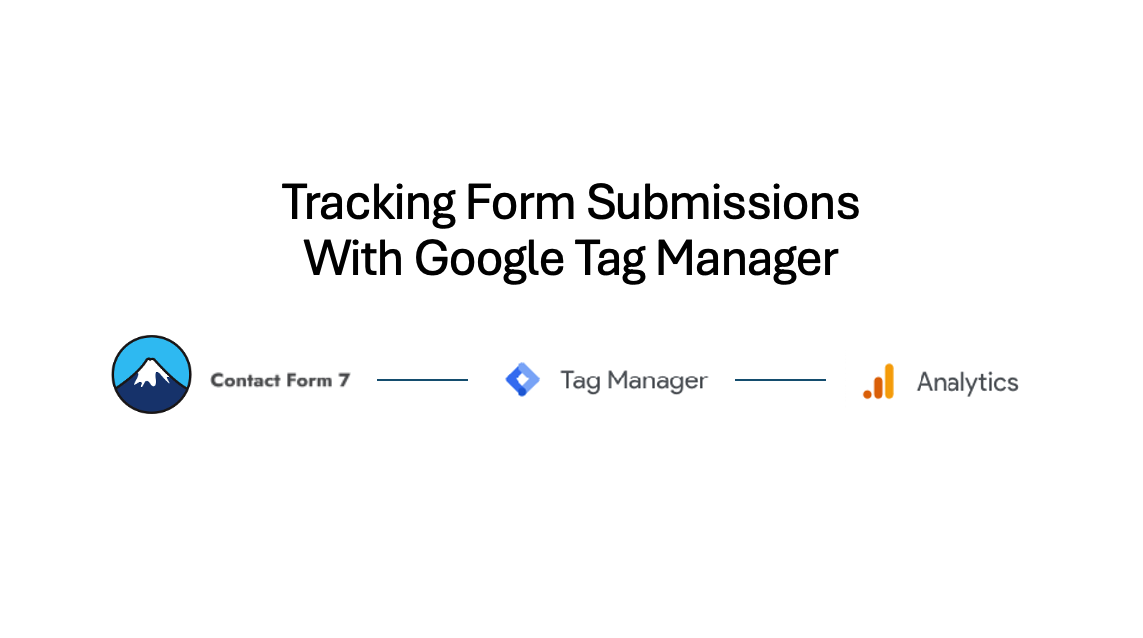
Are you using Contact Form 7 on your WordPress site and looking to enhance your understanding of user interactions? Tracking form submissions effectively not only helps in optimizing the user experience but also provides valuable insights into your audience’s engagement with your website. Contact Form 7, one of the most popular WordPress form plugins, offers robust functionality and flexibility, making it an ideal choice for businesses of all sizes.
In this article, we’ll dive into the specifics of setting up form submission tracking using Google Tag Manager (GTM) with a focus on leveraging Contact Form 7’s built-in DOM events. Whether you’re new to GTM or looking to refine your existing tracking setups, we’ll guide you through the process of capturing valuable data from your forms to inform your marketing strategies and improve overall site performance.
Note: This guide is part of our conversion tracking series using Google Tag Manager. For a beginner guide to form tracking, do view our main article – How to track form submissions.
Overview of Form Submission Tracking Methods
While Contact Form 7 simplifies the creation and management of contact forms on WordPress, tracking these form submissions to analyse performance involves a few more steps. To fully grasp the impact of your forms, you must be able to capture data on how users interact with them. Here we explore several methods to track form submissions, each suited to different needs and technical environments:
- Page View Tracking: This method involves tracking visits to a specific “Thank You” or confirmation page that users are redirected to after submitting a form. It’s a straightforward approach if your form is set to redirect upon submission.
- Submit Button Click Tracking: By monitoring clicks on the submit button, this method records each attempt to submit the form, regardless of whether the submission is successful or not.
- CSS Selector for Success Message: This method uses CSS selectors to detect and track the display of a success message on the form page, indicating a successful submission without redirection.
- Custom DataLayer Event Tracking: The most robust method, this involves pushing custom events from Contact Form 7 into the DataLayer when a form is submitted, allowing for precise tracking of successful submissions and additional data.
Each of these methods has its own set of advantages and can be implemented using Google Tag Manager to enhance your data collection capabilities. While we will focus primarily on the Custom DataLayer Event for its accuracy and depth of data, these other methods are covered in our main article – How to track form submissions. For this comprehensive guide, we will delve into these methods with a special emphasis on integrating Contact Form 7’s DOM events for a seamless and efficient tracking setup.
Identifying Contact Form 7 on Your Website
To effectively set up tracking for Contact Form 7 submissions, you first need to confirm whether your WordPress site is using this specific form plugin. Identifying the form type is crucial as it dictates the customisation and configuration you’ll apply in Google Tag Manager. Here are two straightforward methods to determine if your site is running Contact Form 7:
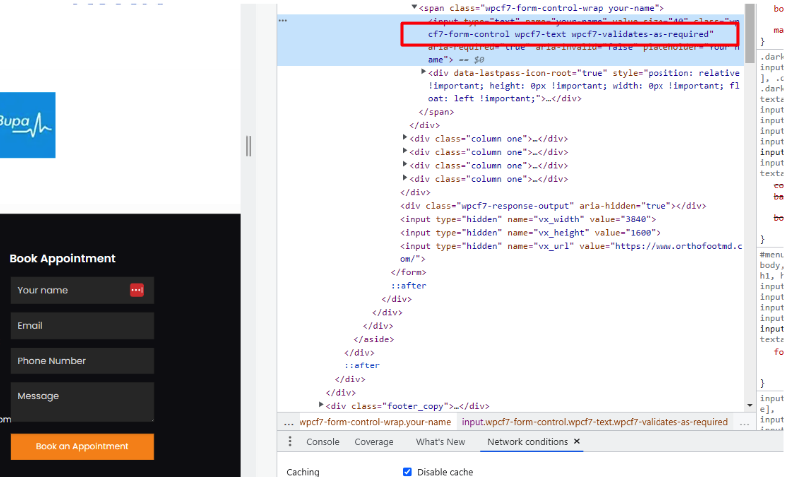
Manual Inspection of Form Code:
- Open the webpage containing the form.
- Right-click on the form and select “Inspect” to open the browser’s developer tools.
- Look at the form’s HTML structure in the Elements panel. Contact Form 7 typically includes specific classes like .wpcf7-form which can be found in the form’s enclosing <div> or directly within the <form> tag.
- Check for hidden inputs or data attributes that indicate the use of Contact Form 7, such as data-wpcf7-form=”contactForm7″.
Using Wappalyzer Chrome Extension:
- Install the Wappalyzer extension from the Chrome Web Store if you haven’t already.
- Navigate to the webpage that contains the form.
- Click on the Wappalyzer icon in your browser’s toolbar to display the detected technologies.
- Look for Contact Form 7 under the categories that might list it, typically found under “CMS” or “JavaScript libraries”.

Pro Tips:
- Cross-Reference Findings: After identifying the plugin through one method, confirm with the other to ensure accuracy.
- Regular Updates: Keep your Wappalyzer extension updated to detect the latest technologies accurately.
- Check for iFrames: If no form type is detected through these methods, consider whether the form might be embedded using an iframe, complicating detection. Look for <iframe> tags around the form area, or use a Chrome extension like “iFrame detector” to identify embedded forms.
Understanding Contact Form 7 Built-in DOM Events
Contact Form 7 supports several DOM events that can be utilised to enhance your tracking capabilities:
- wpcf7invalid: This event fires when an Ajax form submission has completed successfully, but mail hasn’t been sent due to invalid input.
- wpcf7spam: Occurs when an Ajax form submission is complete but is prevented from sending mail because of detected spam activity.
- wpcf7mailsent: Triggers when an Ajax form submission completes successfully, and the email is sent.
- wpcf7mailfailed: Fires when an Ajax form submission has completed successfully, but the email sending process fails.
- wpcf7submit: Fires after an Ajax form submission completes successfully, regardless of whether the mail was sent or not.
These DOM events allow you to easily track various events related to the form, for example the successful submission of a form or an invalid form submission.
Setting Up DataLayer Event Tracking in GTM for Contact Form 7
Tracking form submissions effectively in Google Tag Manager (GTM) involves setting up a system to capture specific events and push them into the DataLayer. For Contact Form 7 (CF7), this means utilising its built-in DOM events to monitor form submissions that result in emails being sent. By capturing these events, you can enrich your analytics with detailed interaction data, improving your ability to analyse and optimise user behaviour.
Implementing a Custom HTML Tag in GTM:
To ensure that form submission events from CF7 are tracked, you’ll need to create a custom HTML tag in GTM that listens for the wpcf7mailsent event. This event is particularly useful as it confirms not just the form submission but also the successful sending of the form’s email, providing a reliable indicator of a completed interaction.
Here’s how to set up the tag:
- Open Google Tag Manager:
Navigate to your GTM dashboard and select or create a container for your website.
- Create a New Tag:
Click on ‘Tags’ from the sidebar menu, then click ‘New’ to start creating a new tag.
Configure the Custom HTML Tag:
- Choose ‘Tag Configuration’ and select ‘Custom HTML’.
Enter the following script into the HTML text area:
<script>
document.addEventListener(‘wpcf7mailsent’, function(event) {
window.dataLayer.push({
“event”: “formSubmit”,
“formId”: event.detail.contactFormId,
“response”: event.detail.inputs
})
});
</script>
This script listens for the wpcf7submit event and then pushes relevant data into the DataLayer, including the form’s ID and the inputs submitted by the user.
In this case, since we used “formSubmit” for the event parameter, this will be the name of our custom event later.
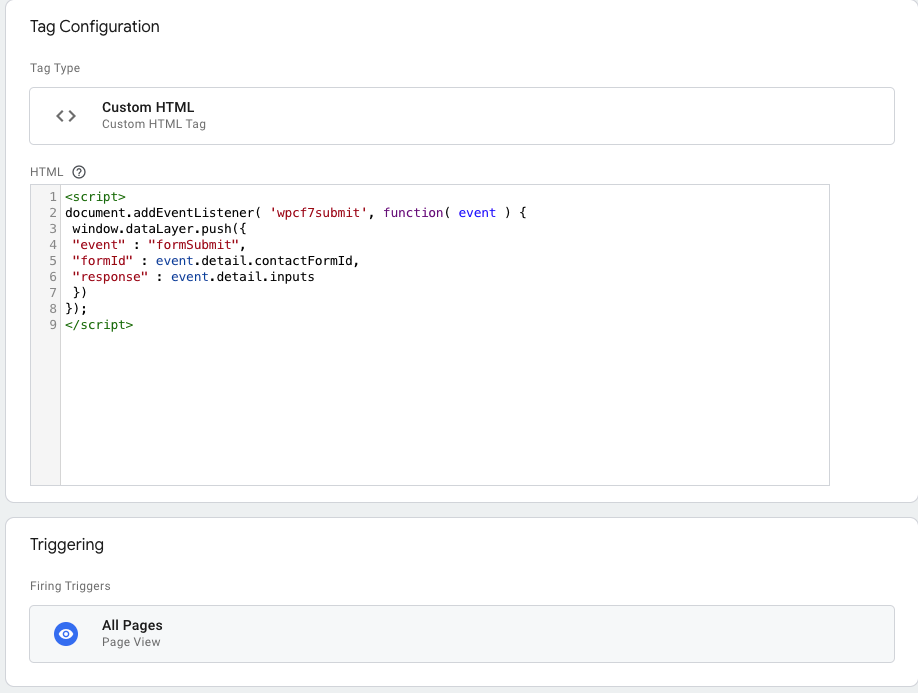
Set Tag Firing Options:
Under ‘Triggering’, select the trigger that fires on all pages. This ensures the script is loaded on every page where a CF7 form might be present, allowing it to capture every instance of the form submission.
Save and Name Your Tag:
Provide a descriptive name for your tag, such as ‘CF7 Form Listener’, and save it.
Details of Data Being Pushed to the DataLayer:
- Event: This is a custom event labeled “formSubmit”, which you will use in GTM to trigger specific tags.
- FormId: The unique identifier of the form that was submitted, useful for differentiating between multiple forms on your site.
- Response: This contains the inputs from the form, offering detailed insight into what users are submitting.
Utilising DataLayer Event To Create The Trigger And Tag
After setting up the DataLayer to capture specific events from Contact Form 7 submissions, the next step is to make practical use of this data within Google Tag Manager. This involves verifying that the DataLayer is receiving the data correctly, creating a custom trigger based on the event, and configuring a tag to send this data to Google Analytics 4 (GA4).
Step 1: Verifying Data in the DataLayer
- Enter GTM Preview Mode: Navigate to your Google Tag Manager workspace and click the ‘Preview’ button to activate the preview mode. This mode allows you to see real-time changes and interactions on your site as you test different configurations.
- Submit a Test Form: Go to a page on your website where a Contact Form 7 form is active and submit the form as a user would. Make sure to fill out the fields required by your form setup.
- Check the DataLayer for Variables: Once the form is submitted and the wpcf7mailsent event is triggered, check the DataLayer tab within the GTM preview pane. You should see the new variables such as event, formId, and response populated with data from the form submission. This step confirms that the custom HTML tag you set up is working correctly and pushing the desired data into the DataLayer.


Step 2: Creating a Custom Trigger
- Set Up a New Trigger: In GTM, go to the ‘Triggers’ section and click ‘New’. Choose ‘Custom Event’ as the trigger type. For the event name, enter “formSubmit”, the same name used in your DataLayer push. This ensures that the trigger listens for exactly this event coming from the DataLayer.
- Configure and Save the Trigger: Name your trigger descriptively, such as ‘CF7 Form Submission Trigger’, and save it. This trigger will now listen for the “formSubmit” event and activate associated tags whenever this event occurs.

Step 3: Creating a Tag to Send Data to GA4
- Create a New GA4 Event Tag: In GTM, create a new tag and select ‘Google Analytics: GA4 Event’ as the tag type. Connect the tag to your GA4 property by specifying the GA4 Configuration Tag or directly entering your Measurement ID.
- Set Up Event Parameters: Configure the tag to send event data. Name the event (e.g., ‘CF7 Submission’ – this is the name that will be passed onto GA4), and use the DataLayer variables to send additional data such as the form ID and user responses. You can set up event parameters to capture specific form details that are important for your analytics.
- Link the Tag to Your Custom Trigger: Assign the newly created ‘CF7 Form Submission Trigger’ to this tag. This setup ensures that the tag fires every time the custom event is triggered in the DataLayer.
- Save and Test Your Tag: Save your new tag and use GTM’s preview mode to test it. Submit a form to see if the tag fires and the data appears in GA4’s real-time or DebugView reporting.
- Publish Your Changes: Once you’ve verified that everything is functioning as expected and the data appears correctly in Google Analytics, go ahead and publish your changes in GTM.
Advantages of Using This Method:
Accuracy and Relevance: By tracking only forms that successfully send an email, you ensure the data is relevant and reflects actual user conversions.
Rich Data Capture: Pushing form ID and responses into the DataLayer allows for deeper analysis of form interactions, enabling more targeted and effective optimisations.
Conclusion
With the setup detailed in this guide, you can harness the power of Google Tag Manager and Google Analytics 4 to capture valuable data from Contact Form 7 submissions, enriching your understanding of how users engage with your forms.
At First Page Digital, we specialize in offering comprehensive digital marketing solutions, including advanced form tracking setups like the ones described here. As a leading digital marketing agency, we understand the importance of leveraging precise and actionable data to enhance campaign strategies and boost conversion rates. As such, all SEO services and PPC campaigns include free tracking setup for your website’s contact form 7.
If you’re looking to refine your digital marketing efforts or need assistance implementing sophisticated tracking solutions, we invite you to consult with our experts.